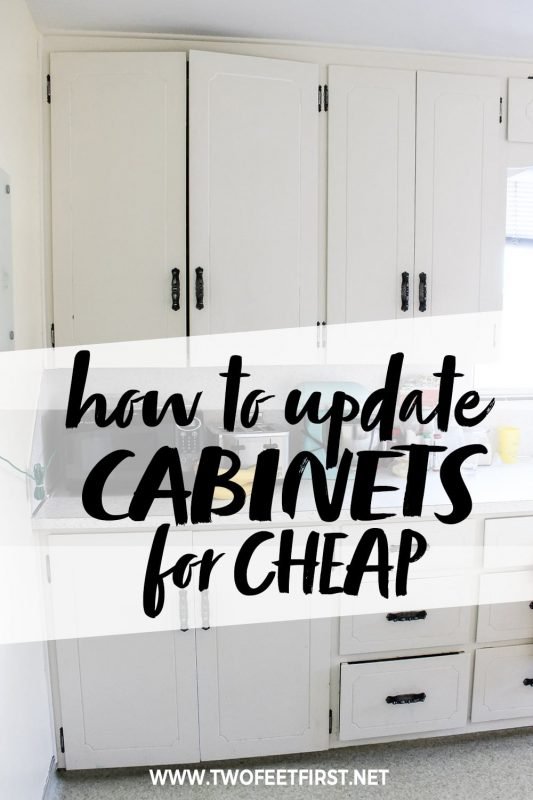
Replacing the Bottom of a Kitchen Cabinet
A step-by-step tutorial on how to update kitchen cabinets without replacing them by adding MDF trim to the door to create a DIY shaker style cabinet.
When you moved into your home, you had an ambitious list of all the renovations you would tackle in the first year.
How could you have known that you would soon be sitting on cracked foundations and sweating with a faulty HVAC system?
These unexpected emergency repairs drained your home improvement funds over the years.
Today, you're still staring at the worn, neglected kitchen cabinets. Their sad, rusted knobs and badly-scratched surfaces beg for your attention.
And your kitchen is the last place you want to hang out when family and friends come over.
Is your homeowner anxiety making you sweat or is it the cooling system again?
Our own kitchen cabinets were outdated, but I could not bring myself to rip out these solid wood cabinets. Neither did I want to spend the money or time to build new ones.
In the end, we decided to update the kitchen cabinets, without replacing them, by adding MDF trim to create DIY shaker cabinet doors.
We have always loved the look of the classic shaker style furniture – it complements any design aesthetic with its simple elegance and clean lines.

Yes, these are the same 'old' kitchen cabinets!
CAN I UPDATE CABINET DOORS WITH MDF?
Did you ever consider updating cabinet doors with MDF?
You can use MDF on cabinet doors as long as you are painting the doors. If you want to avoid painting the cabinet doors, choose a different material.
MDF is easy to work with and you won't need as much prep work to achieve a smooth surface.
If you are still not sure if you should use MDF on your cabinet doors, see my post on how the kitchen cabinets are one year later, or better yet visit my post about would I paint my kitchen cabinets again, which was after four years.
Want to see how to create DIY shaker cabinet doors? Here are the supplies you will need:
Disclosure: This post contains some affiliate links or referral links for your convenience. It is a way for this site to earn advertising commissions by advertising or linking to certain products and/or services, click here to read my full disclosure policy .
INFORMATION ABOUT MDF TRIM
Although I used other tutorials as my inspiration to start my project, something worried me – the other tutorials were working with 1/4″ plywood.
If you have ever used cheap plywood before, you would know that it splinters easy, and there can be gaps in the sides of the wood (unless you use a more expensive cabinet grade plywood). You would have to do some prep work to the plywood before you could use it to make cabinet doors.
Because of this, I put off buying the plywood for a month, while I considered my options.
Finally, I went to Home Depot (love my local store) and found a helpful worker. I explained to him what I was doing and asked what his thoughts were.
Not surprisingly, he had the same concerns I did about using plywood.
He said it would take a LOT of prep work to get the type of finish I wanted and he recommended that we look for a different/better product, possibly MDF.
At first, the thought of using MDF instantly brought up a mental image of water-logged trim pieces, sagging and eventually disintegrating onto my kitchen floors. MDF, by itself, is not water-proof.
Still, he calmed my fears and assured me it would work.
All I would need to do to give it a water-proof coat is to paint it
Intrigued, I had him cut the 4'x8′ sheet of 1/4″ MDF into strips of 3″ for the cabinet doors and 2″ for the cabinet drawers. (One side of the MDF I used has a white vinyl finish on it.)

PREP CABINET DOORS FOR TRIM
Before adding the MDF trim to the cabinet doors and drawer fronts, you need to prep the doors so they are ready for paint.
To begin, remove the doors and drawer fronts from the cabinet bases and clean them with TSP cleaner or regular Dawn dish soap.SIDE NOTE: I decided to strip all the old paint off my cabinet doors because they were not painted very well before (paint drip marks were still visible).


Also, make sure to fill in any imperfections with spackling paste (wood grain) or wood filler.
Finally, sand the wood with #220 grit sandpaper, wiping clean with a cloth to remove any dust.
DIY MDF SHAKER CABINET DOORS
At this point, the MDF is cut, and the doors and drawer fronts are removed, cleaned and sanded. Now it's time to add trim to the cabinet doors.
I found this process to be simple and fun!
STEP 1: PREP THE MDF
The first step is to prep the MDF strips. To do this, sand the edges with #220 grit sandpaper to give them a smooth finish after cutting (this takes no time at all).
SIDE NOTE: The white vinyl side was difficult to sand (it took it all off), so I decided to place that side against the door.
TIP: Be gentle when handling the 1/4″ strips because the corners can dent if you are not careful.
STEP 2: CUT MDF TRIM FOR SIDES OF CABINET DOOR
Next, place the MDF strip flat on a sheet on the ground. Then, rest the cabinet door, front side down, on top of the strip.
TIP: Remember to use the correct MDF strip (3″ for the doors or 2″ for the drawers).
Adjust the MDF to be flush with one of the longer sides of the cabinet door. Using a pencil, mark where the end of the door will be on the MDF strip.
Do this for both long sides of the door, placing an "H" on the MDF strip that will be on the handle side. This will help you remember what piece goes where.

Then, take the boards to the miter saw and cut right next to the line.
TIP: Cut next to the line to make sure there will always be enough trim on the door (the extra will be sanded down).
After cutting both long trim pieces, place them on the top of the cabinet door (front side up this time) to check the fit.
STEP 3: INSTALL THE MDF TRIM TO THE DOOR
Now, you are ready to attach the trim to the door.
Take the MDF trim pieces off the cabinet door and place them right next to the side they will be installed on, putting them front side down.
Then, take a dry cloth and wipe both MDF trim pieces and cabinet door. This will remove dust to help the liquid nails or wood glue adhere.
With the liquid nails (or wood glue), apply a small bead in a zig-zag pattern along the MDF strip, making sure to stay 1/2″ away from all sides.
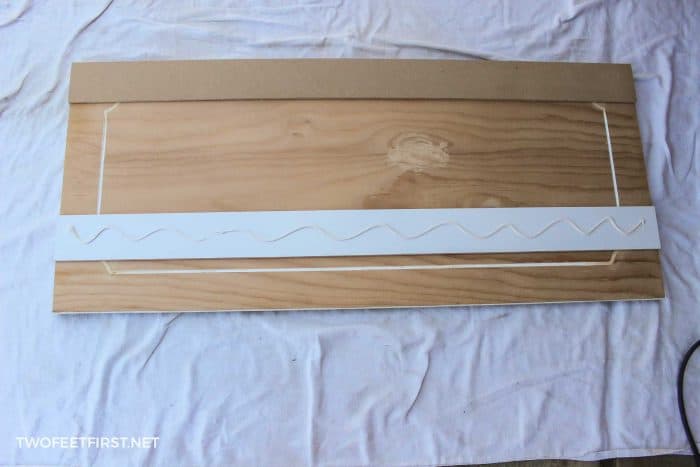
TIP: Only apply to one trim piece at a time.
Place the MDF trim piece onto the cabinet door, making sure everything is flush.
Take the nail gun (I would suggest using an 18-gauge brad nailer) and place a 5/8″ nail in one corner of the MDF trim.
TIP: Keep in mind that some cabinets have an inset of 3/8″ (routered edge or groove around the door to inset into the cabinet). Make sure you avoid the groove when placing the nail by nailing 3/4" to an 1 " away from the edge or you will have a nail sticking through both sides.
Move along the same side and place more nails, making sure everything is flush as you go.
Place nails on both sides of the trim piece – I like to have at least five nails on one side.
Complete this process for the other MDF trim piece.

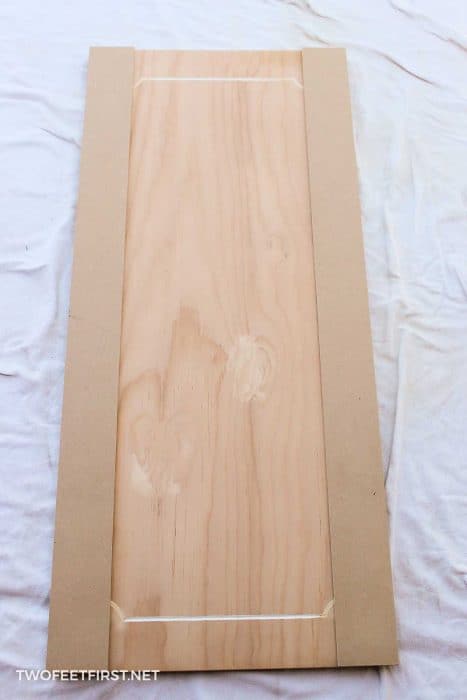
STEP 4: CUT INSIDE MDF TRIM PIECES FOR CABINET DOOR
Once both side pieces are attached, you can add the inside trim pieces.
To do this, take an MDF strip and place the edge against the newly added trim piece. Then, mark the strip directly above the other trim piece. Also, mark which side is top or bottom to know where they will go after cutting.
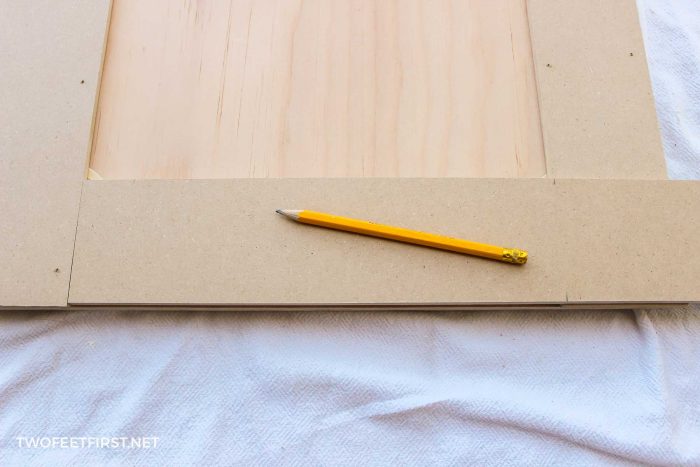
You can also use a square to give you a more exact fit.

Back at the miter saw, cut the MDF strip right next to the markings.
TIP: Remember, it's better to have this cut bigger. You can always trim the strip down later, as I did with each piece.
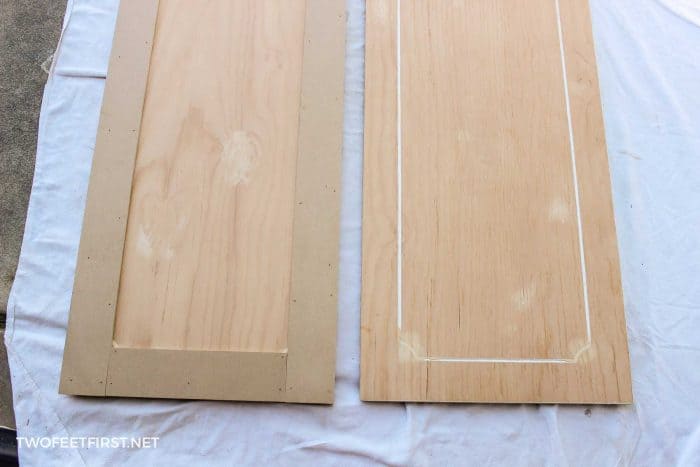
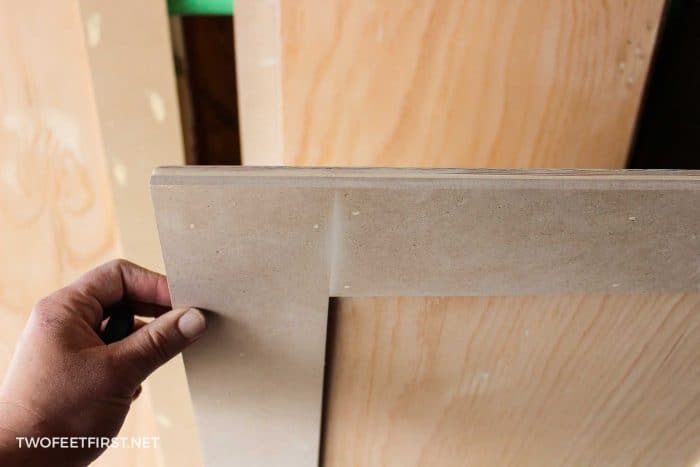
After cutting the trim pieces, take them back to the cabinet door and see how they fit. If the trim piece is too big, cut a little bit more from the MDF.
Your goal is to have this piece fit perfectly with a minimal gap. The example below was the piece I cut that had the most significant gap.

Once the pieces fit perfectly, wipe everything with a dry cloth, and attach the trim pieces the same way as the side pieces (liquid nails & finishing nails).
Now complete all other cabinets doors and drawer fronts in the same way.
TIP: Do one door at a time. Do not assume the sides will be the same length because almost all of mine were not.
SIDE NOTE: Please follow the method of using the cabinet door as the guide to get the same look as the doors shown.
STEP 5: SAND THE MDF SHAKER CABINET DOORS
After adding the trim pieces to all the cabinet doors, sand the edges of the trim to make everything even. See the picture below for the before and after sanding.


Now, it's time to fill in all the holes and gaps with wood filler (or spackling paste).
SIDE NOTE: You do NOT need a stainable wood filler (the stainable one costs more money and is more difficult to apply. You can even use spackling paste.
Using a putty knife (or finger, yes it works!), fill in all the nail holes and the sides of the cabinet doors where the trim meets against the door, and also where the trim pieces meet on the front of the door.
Once the filler has dried, sand each door with #220 grit sandpaper to give you a smooth finish. Afterwards, check if you need to reapply any wood filler to even out the surface (you should not be able to see where nails were placed). Let that dry and sand the doors again.
TIP: Make sure all your trim edges and sides are level with the cabinet door to make sure you have no trouble with your doors closing when they are reassembled to the cabinets.

When everything is sanded properly, vacuum all the doors and wipe with a dry cloth to remove any dust.
Next, apply white caulk sealant to the inside of the door where the new trim hits the cabinet door. See the white around the inside panel on this door? This is where the caulk will be placed.
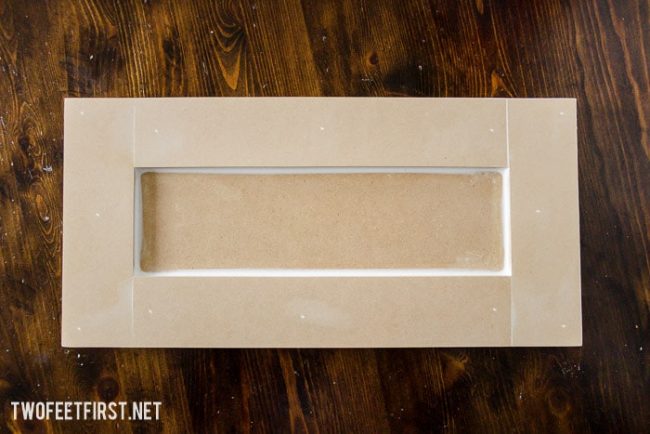
SIDE NOTE: This cabinet door was made using the same method, but I actually used only MDF to make cabinet drawers from scratch .
STEP 6: PAINT THE CABINET DOORS
At this point, the cabinet doors are all ready for paint and primer.
This post is all about installing trim to cabinet doors so be sure to visit my post about how to paint kitchen cabinets with a paint sprayer or use Young House Love's tutorial on how to paint kitchen cabinets.
But let's show you the difference:

Let me give you the cost breakdown of this project without the paint.
COST:
– 1/4″ MDF sheet = $26
– liquid nails = $3
– 5/8″ finishing nails = $3
– wood filler = $6
– caulk = $4
TOTAL = $42
If you add paint & primer = about $120 (that's 2 gallons of paint & 1 gallon of primer)
What do you think of our cheap DIY shaker style cabinet doors?
Now you have transformed a part of your kitchen with a simple, updated design. You can finally cross another item off your home improvement list! I hope this helps you to update kitchen cabinets without replacing them.
FULL PROJECT VIDEO:
Are you someone that does better with visuals? Check out the full project video below and don't forget to subscribe on YouTube so you don't miss out on future projects!

Interested in more Kitchen renovation projects? Here are some other posts you might enjoy:
- DIY pullout baking sheet drawer
- DIY cage pendant light
- DIY painted backsplash to look like subway tile
- Industrial pan storage rack
Prep Time 30 minutes
Active Time 8 hours
Additional Time 10 days
Total Time 10 days 8 hours 30 minutes
Difficulty Moderate
Estimated Cost $100
Materials
- 1/4″ MDF sheet or Cabinet Grade Plywood (I used one cut to 3″ for the doors & 2″ for the drawers)
- liquid nails or wood glue
- 5/8″ brad nails
- wood filler
- caulk
- pencil
Tools
- miter saw
- nail gun w/air compressor
- caulk gun
- orbital sander
- putty knife
Replacing the Bottom of a Kitchen Cabinet
Source: https://www.twofeetfirst.net/update-kitchen-cabinet-doors-for-cheap/